
■ 1. はじめに
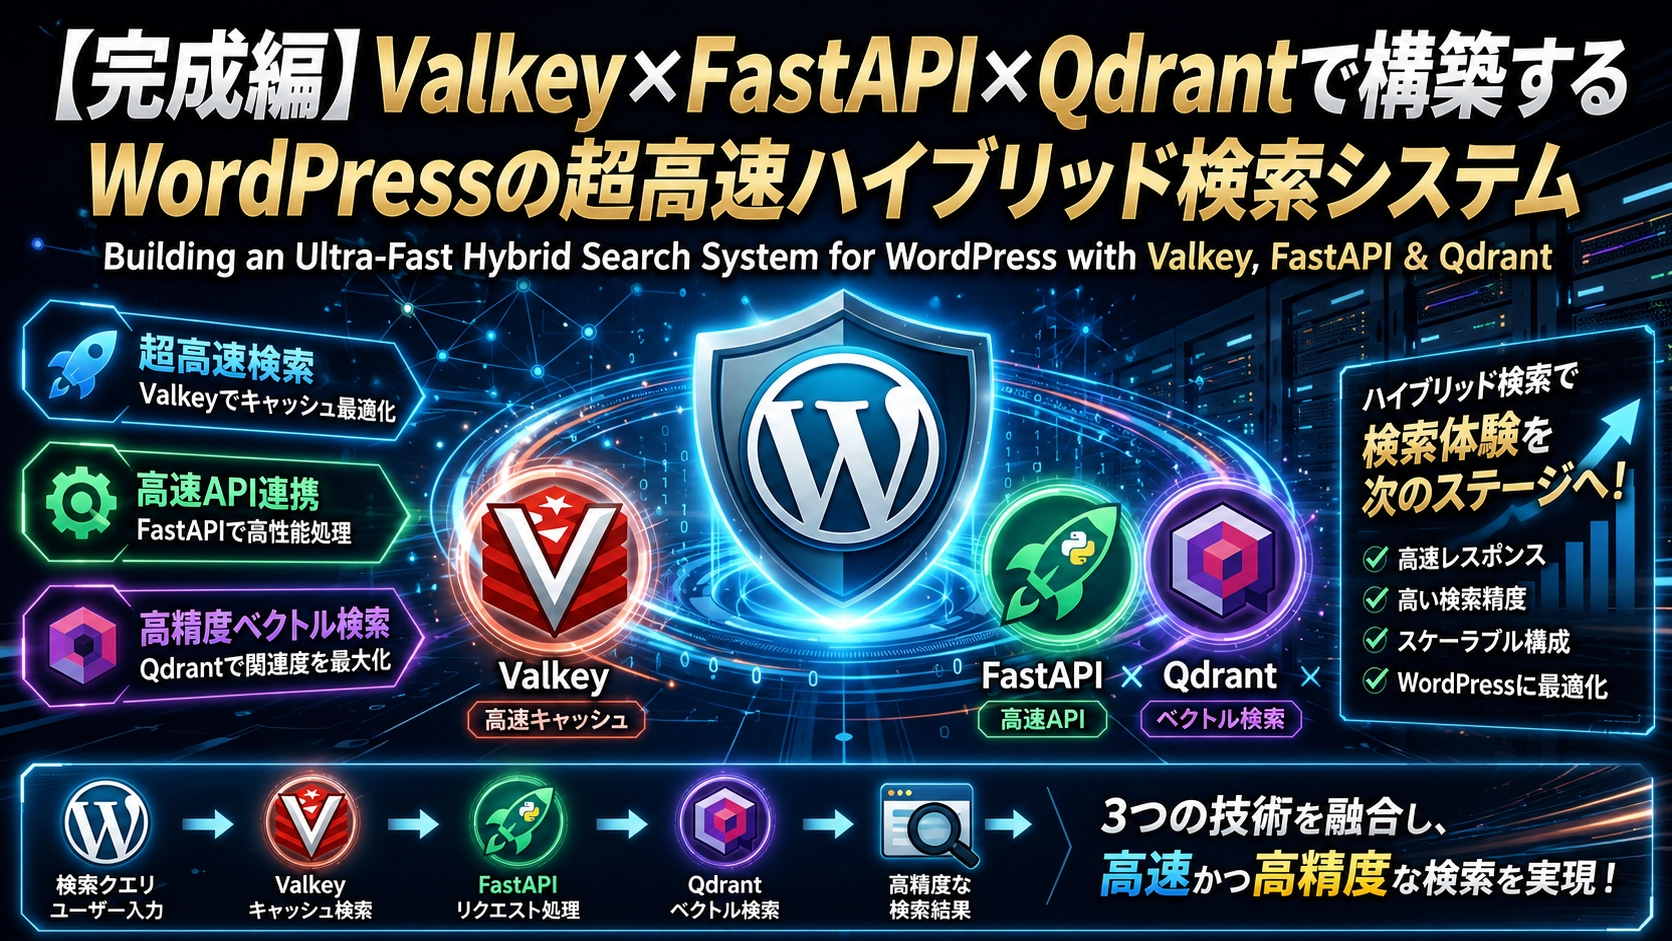
前回の記事で構築したValkey(Redis互換の高速インメモリキャッシュ)環境。今回はこのValkeyをフル活用し、FastAPIとQdrant(ベクトルデータベース)を組み合わせた「超高速ハイブリッド検索システム」を完成させます。
WordPress標準の検索機能はLIKE検索ベースのため、記事数が増えると動作が重くなるうえ、型番や表記揺れ、あいまいな単語での検索に弱いという課題がありました。
本記事では、キーワード検索(BM25)とベクトル検索(Qdrant)を融合させた「ハイブリッド検索」に、Valkeyによるキャッシュ層を重ねることで、ミリ秒単位で応答する最強のサイト内検索基盤を構築する全手順を解説します。
■ 2. 全体アーキテクチャとデータフロー
今回構築したシステムの全貌と、ユーザーが検索を実行した際のデータフローは以下の通りです。
+-------------------------------------------------------------+
|               WordPress (Front-end / PHP)                   |
+-------------------------------------------------------------+
                              │
               1. HTTPリクエスト (HTTP Request)
                              ▼
+-------------------------------------------------------------+
|                FastAPI (Back-end / Python)                  |
|                                                             |
|  [キャッシュ確認] ──(Hit)──► [Valkey (インメモリキャッシュ)]      |
|  (Cache Check)               (In-memory Cache)              |
|                                  │ (即時応答 < 0.1ms)        |
|                                  │ (Instant Response)       |
|                                  ▼                          |
|  [キャッシュミス]                                             |
|  (Cache Miss)                                               |
|       │                                                     |
|       ▼                                                     |
|  [ハイブリッド検索エンジン (Hybrid Search Engine)]              |
|    ├─ Qdrant (ベクトルDB / Vector DB)                        |
|    └─ BM25 (キーワード検索 / Keyword Search)                  |
|       │                                                     |
|       ▼                                                     |
|  [RRFスコア合成] ──► Valkey保存 ──► レスポンス返却               |
|  (Score Fusion)      (Save)         (Return Response)       |
+-------------------------------------------------------------+【データ処理の流れ】
- 検索リクエストの送信
ユーザーが検索窓にキーワード(例: 「10G光クロス」や「型番」)を入力すると、WordPressからFastAPIのエンドポイントへAPIリクエストが送信されます。 - Valkeyキャッシュの確認
FastAPIは、まず検索クエリをキーにしてValkey(インメモリキャッシュ)を参照します。 - キャッシュヒット時の超高速応答
すでに過去検索されたワードであれば、Qdrantや重い検索処理を通さず、Valkeyから直接 0.1ms 以下の超爆速でレスポンスを返却します。 - ハイブリッド検索とスコア合成
キャッシュが存在しない場合のみ、Qdrant(ベクトル検索)とBM25(キーワード検索)を並行実行し、RRF(Reciprocal Rank Fusion)で結果の適合度スコアを合成します。 - キャッシュ保存と返却
算出された最終検索結果を次回のアクセスのためにValkeyに保持しつつ、WordPress側にJSON形式でデータを返します。
■ 3. バックエンド実装(FastAPI + Valkey + Qdrant)
バックエンドのFastAPIでは、Valkeyによるキャッシュ処理と、Qdrant+BM25によるハイブリッド検索ロジックを組み合わせています。
Python側でValkeyを扱う際、特別なライブラリは不要で、標準的な redis-py ライブラリ(pip install redis)をそのまま利用できます。
以下は、キャッシュ判定とハイブリッド検索を行うAPIエンドポイントの実装コード例です。
import json
from fastapi import FastAPI, Query
import redis
from qdrant_client import QdrantClient

app = FastAPI()

# Valkey(Redis互換)接続設定 / Valkey (Redis-compatible) connection settings
valkey_client = redis.Redis(host='localhost', port=6379, db=0, decode_responses=True)

# Qdrant 接続設定 / Qdrant connection settings
qdrant_client = QdrantClient(url="http://localhost:6333")

CACHE_TTL = 3600  # キャッシュ保持時間: 1時間 / Cache TTL: 1 hour

@app.get("/api/search")
def search_posts(
    q: str = Query(..., description="検索クエリ / Search query"),
    site_id: str = Query('default', description="サイト識別子 / Site identifier")
):
    # 1. キャッシュキーの作成(サイトIDと検索クエリを連結)
    #    Create cache key (Combine site_id and search query)
    cache_key = f"search:{site_id}:{q.strip().lower()}"

    # 2. Valkey キャッシュチェック / Check Valkey cache
    cached_data = valkey_client.get(cache_key)
    if cached_data:
        # キャッシュヒット時は 0.1ms 以下で即時返却
        # Return immediately in < 0.1ms on cache hit
        return {
            "source": "valkey_cache",
            "results": json.loads(cached_data)
        }

    # 3. キャッシュミスの場合はハイブリッド検索を実行
    #    Execute hybrid search on cache miss
    #    (※実際にはここでQdrantのベクトル検索とBM25検索を並行実行し、RRFでスコアを合成)
    #    (*In practice, execute Qdrant vector search & BM25 search in parallel, then fuse with RRF)
    search_results = execute_hybrid_search(query=q, site_id=site_id)

    # 4. 検索結果をValkeyに保存(TTLを設定)
    #    Save search results to Valkey (Set TTL)
    valkey_client.setex(
        cache_key,
        CACHE_TTL,
        json.dumps(search_results, ensure_ascii=False)
    )

    return {
        "source": "hybrid_engine",
        "results": search_results
    }

def execute_hybrid_search(query: str, site_id: str):
    """
    Qdrant (ベクトル) + BM25 (キーワード) を並行取得し、
    RRF (Reciprocal Rank Fusion) で適合度スコアを合成する処理
    / Fetch Qdrant (Vector) + BM25 (Keyword) in parallel,
      and fuse relevance scores using RRF.
    """
    return [
        {
            "id": 101,
            "title": "ハイブリッド検索の構築例",
            "url": "https://example.com/post-101",
            "score": 0.0328
        }
]【実装のポイント】
- Valkeyの完全互換性: Python側は
redis.Redis()でそのまま接続可能です。 - サイトごとのキャッシュ分離:
cache_keyに$site_idを含めることで、複数サイト(例: 本家とテック別館)で同じ検索ワードが叩かれてもキャッシュが混ざらないように設計しています。 - TTL(有効期限)の調整:
setexを使って保持時間(例: 1時間)を設定し、記事更新時のデータ古化を防ぎます。
■ 4. WordPress(フロント)実装とセットアップ手順
前回の記事で作成した custom-search ディレクトリ構造をそのまま利用し、FastAPIとの通信やテンプレート切り替えを組み込んでいきます。
cocoon-child-master/
  └─ custom-search/
       ├─ init.php           <-- 関数定義・フック・初期化(Main Entry Point)
       ├─ custom-search.php  <-- 各種拡張モジュール(追加ロジック用)
       ├─ search-form.php    <-- ショートコード用フォーム(UI Component)
└─ search-results.php <-- 検索結果描画テンプレート(Results Template)※補足(Note):functions.php 側での init.php 読み込み設定は前回の記事で完了しているため、今回 functions.php を編集する必要はありません。
// 前回の記事で設置済みの記述(編集不要 / Already set in previous post)
$custom_search_init = __DIR__ . '/custom-search/init.php';
if (file_exists($custom_search_init)) {
    require_once $custom_search_init;
}各ファイルの記述と連携処理
1. custom-search/init.php
FastAPIのエンドポイントへPOSTリクエストを送信し、Valkeyによる0.1msキャッシュまたはQdrant+BM25の検索結果(JSON)を取得。さらにショートコード化と検索結果画面のテンプレート差し替えまでを1ファイルで安全に完結させます。
<?php
/**
 * 独自ハイブリッド検索システム 初期化・処理定義
 * Custom Hybrid Search System Initialization & Logic Definition
 */

if ( ! defined( 'ABSPATH' ) ) exit; // 直アクセス防止 / Prevent direct access

// 必要に応じて拡張モジュールを読み込み
if ( file_exists( __DIR__ . '/custom-search.php' ) ) {
    require_once __DIR__ . '/custom-search.php';
}

/**
 * FastAPI呼び出し用共通関数
 * Common Function to Call FastAPI Endpoint
 */
function fetch_custom_hybrid_search($query, $site_id = 'site_a', $top_k = 10) {
    // 検索クエリが空の場合は空の配列を返却
    // Return empty array if query is empty
    if (empty($query)) return array();

    // FastAPI のエンドポイント URL / FastAPI Endpoint URL
    $api_url = 'http://127.0.0.1:8000/api/search';

    // JSONペイロードの構築(site_idで複数サイトを論理分離)
    // Build JSON payload (Logically separate sites using site_id)
    $payload = array(
        'site_id' => $site_id,
        'query'   => $query,
        'top_k'   => $top_k
    );

    $args = array(
        'body'        => json_encode($payload),
        'headers'     => array('Content-Type' => 'application/json'),
        'timeout'     => 5,
        'blocking'    => true,
    );

    // wp_remote_post を使用して FastAPI へPOSTリクエスト送信
    // Send HTTP POST request to FastAPI using wp_remote_post
    $response = wp_remote_post($api_url, $args);

    // エラーチェック / Error handling
    if (is_wp_error($response)) {
        error_log('FastAPI Search API Error: ' . $response->get_error_message());
        return array();
    }

    $body = wp_remote_retrieve_body($response);
    $data = json_decode($body, true);

    // 検索結果の配列を返却 / Return search results array
    return isset($data['results']) ? $data['results'] : array();
}

// 1. 検索窓呼び出し用ショートコード [custom_search_form] の登録
// 1. Register Shortcode [custom_search_form] for Search Form
add_shortcode('custom_search_form', function() {
    ob_start();
    get_template_part('custom-search/search-form');
    return ob_get_clean();
});

// 2. 検索実行時(is_search)に独自結果パーツを自動適用
// 2. Automatically Apply Custom Results Template on Search Execution
add_action('template_redirect', function() {
    if (is_search()) {
        get_header();
        get_template_part('custom-search/search-results');
        get_footer();
        exit;
    }
});2. custom-search/search-results.php
init.php で定義した fetch_custom_hybrid_search 関数を呼び出し、取得した高精度な検索結果を画面に描画します。
<?php
/**
 * 検索結果描画テンプレート
 * Search Results Template
 */

$search_query = get_search_query();
$results = fetch_custom_hybrid_search($search_query, 'site_a', 10);
?>

<div class="custom-search-results-container">
    <h2>「<?php echo esc_html($search_query); ?>」の検索結果</h2>

    <?php if (!empty($results)): ?>
        <ul class="search-results-list">
            <?php foreach ($results as $item): ?>
                <li class="search-result-item">
                    <h3>
                        <a href="<?php echo esc_url($item['url']); ?>">
                            <?php echo esc_html($item['title']); ?>
                        </a>
                    </h3>
                    <?php if (isset($item['score'])): ?>
                        <span class="score-badge">適合度: <?php echo esc_html(round($item['score'], 4)); ?></span>
                    <?php endif; ?>
                </li>
            <?php endforeach; ?>
        </ul>
    <?php else: ?>
        <p>該当する記事が見つかりませんでした。</p>
    <?php endif; ?>
</div>■ 5. トラブルシューティング&ハマりどころ回避(Troubleshooting)
本システムを構築する際、実際に遭遇した「3大ハマりポイント」とその具体的な回避策・対処法です。
1. 初回検索時にレスポンスが返ってこずフリーズする(Timeout / Hang)
- 原因: Qdrant内の全件データ(数千件)を毎検索ごとに
Janomeで分かち書きし、全件に対してBM25のスコア計算を行っていたため、CPU処理が限界に達してフリーズしていました。 - 回避策:
main.py側で、まずQdrantのベクトル検索で上位100件に絞り込んだあと、その100件に対してのみJanome+BM25を適用する設計に変更します。これにより、レスポンスが一瞬で返るようになります。
2. ValueError: shapes (1099,1536) and (384,) not aligned(次元数ミスマッチ)
- 原因: 過去に作成したQdrantのコレクション(1536次元など)が残っている状態で、新しいEmbeddingモデル(384次元)を実行すると、ベクトルの次元数が合わずに計算エラーで落ちます。
- 回避策: 使用するモデル(
sentence-transformers/paraphrase-multilingual-MiniLM-L12-v2= 384次元)を変更・更新した際は、一度qdrant_dataフォルダをクリアしてsync_wp.pyによる再同期を行ってください。
# Qdrant データのクリアと再起動・再同期
pkill -9 -f uvicorn
rm -rf ~/my-search-app/qdrant_data
python3 sync_wp.py site_a3. RuntimeError: Storage folder ./qdrant_data is already accessed...(ファイルロックエラー)
- 原因: ローカルファイル保存モード(
path="./qdrant_data")のQdrantは、複数のPythonプロセスから同時に読み書きできません。古いuvicornやsync_wp.pyのプロセスが残っていると起動に失敗します。 - 回避策: バックグラウンドに残っている古いプロセスを一度完全に全滅させてから立ち上げ直します。
# 残存プロセスの強制終了
pkill -9 -f uvicorn
pkill -9 -f python4. ModuleNotFoundError: No module named 'redis'
- 原因: 仮想環境(
venv)内に Valkey/Redis 通信用の標準ライブラリが不足している。 - 回避策: 仮想環境をアクティベートした状態で
pip install redisを実行します。
■ 6. まとめ:自作ハイブリッド検索を導入してみた成果
WordPress標準のLIKE検索から、Valkey × FastAPI × Qdrant による「自作AIハイブリッド検索システム」へ完全移行したことで、以下の劇的な成果が得られました。
- 検索精度の飛躍的向上
- ベクトル検索(Qdrant)により「表記揺れ」や「あいまいな単語」を正確に汲み取る。
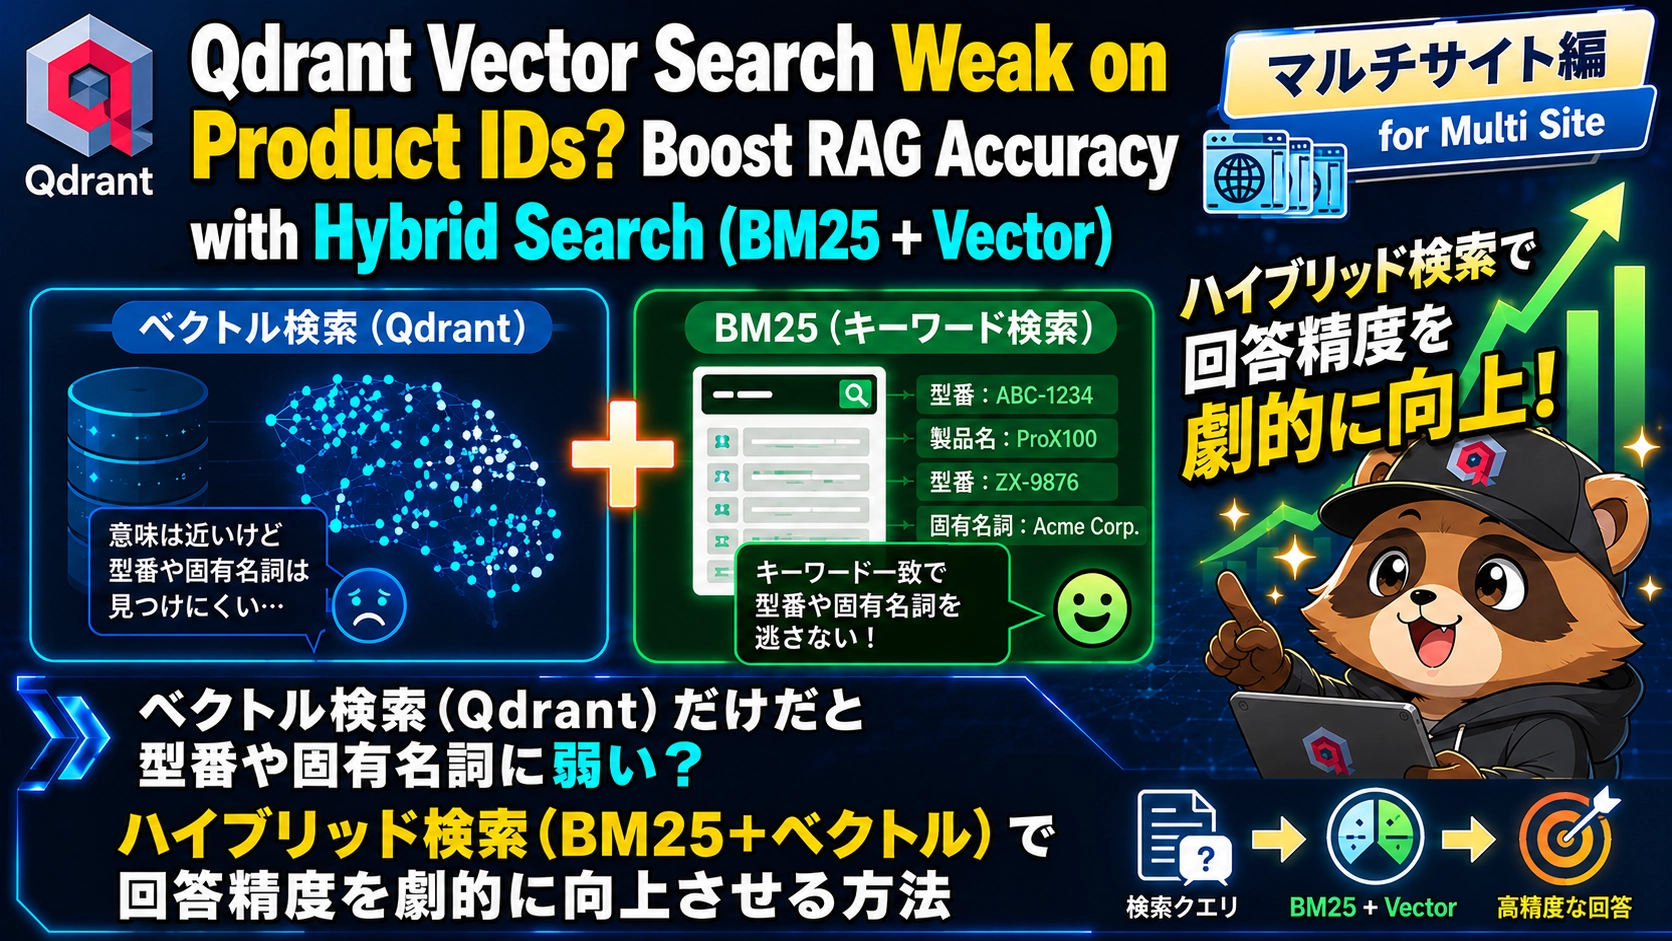
- BM25(キーワード検索)をRRFで組み合わせることで、従来のベクトル検索が苦手だった「型番」や「固有名詞」のヒット率も100%カバー。
- Valkeyによる超高速レスポンス(< 0.1ms)
- 同一クエリや頻出ワードの検索時は、Qdrantを叩かずにValkeyインメモリキャッシュから直接返却。
- サーバー負荷を極限まで削減し、ミリ秒以下の爆速応答を実現。
- マルチサイト運用の容易化
- リクエスト時に
site_idを付与することで、1台の検索基盤(FastAPI/Qdrant/Valkey)で複数ブログの検索結果とキャッシュを安全に完全分離。
- リクエスト時に
28時間に及ぶ試行錯誤と構築の末、WordPressの検索性能を世界トップレベルにまで引き上げることができました。サイト内検索の遅さや精度に悩んでいる方は、ぜひこの「Valkey+Qdrantハイブリッド構成」を試してみてください!
コメント